Working with databases in your Linx solutions is easy with the Linx Database plugin. The Database plugin allows you to interact with databases. These interactions include:
- Execute simple to complex SQL Queries
- Execute stored procedures (you can also pass parameters)
- Bulk Copy (For MS SQL and Oracle)
- Transactions
- MongoDB read and write
Linx supports almost any database, including ODBC databases, SQL Server, OLE, Oracle and MongoDB. This article will show you how to connect with your database using the Connection Editor and how to write SQL statements using the SQL Editor.
The low-code tool allows easy database access by using drag-and-drop functions to execute SQL Queries. These queries can be written by users or generated from database objects. The function manages all database connection activities, meaning you only need to specify the connection string and the query you want to execute.
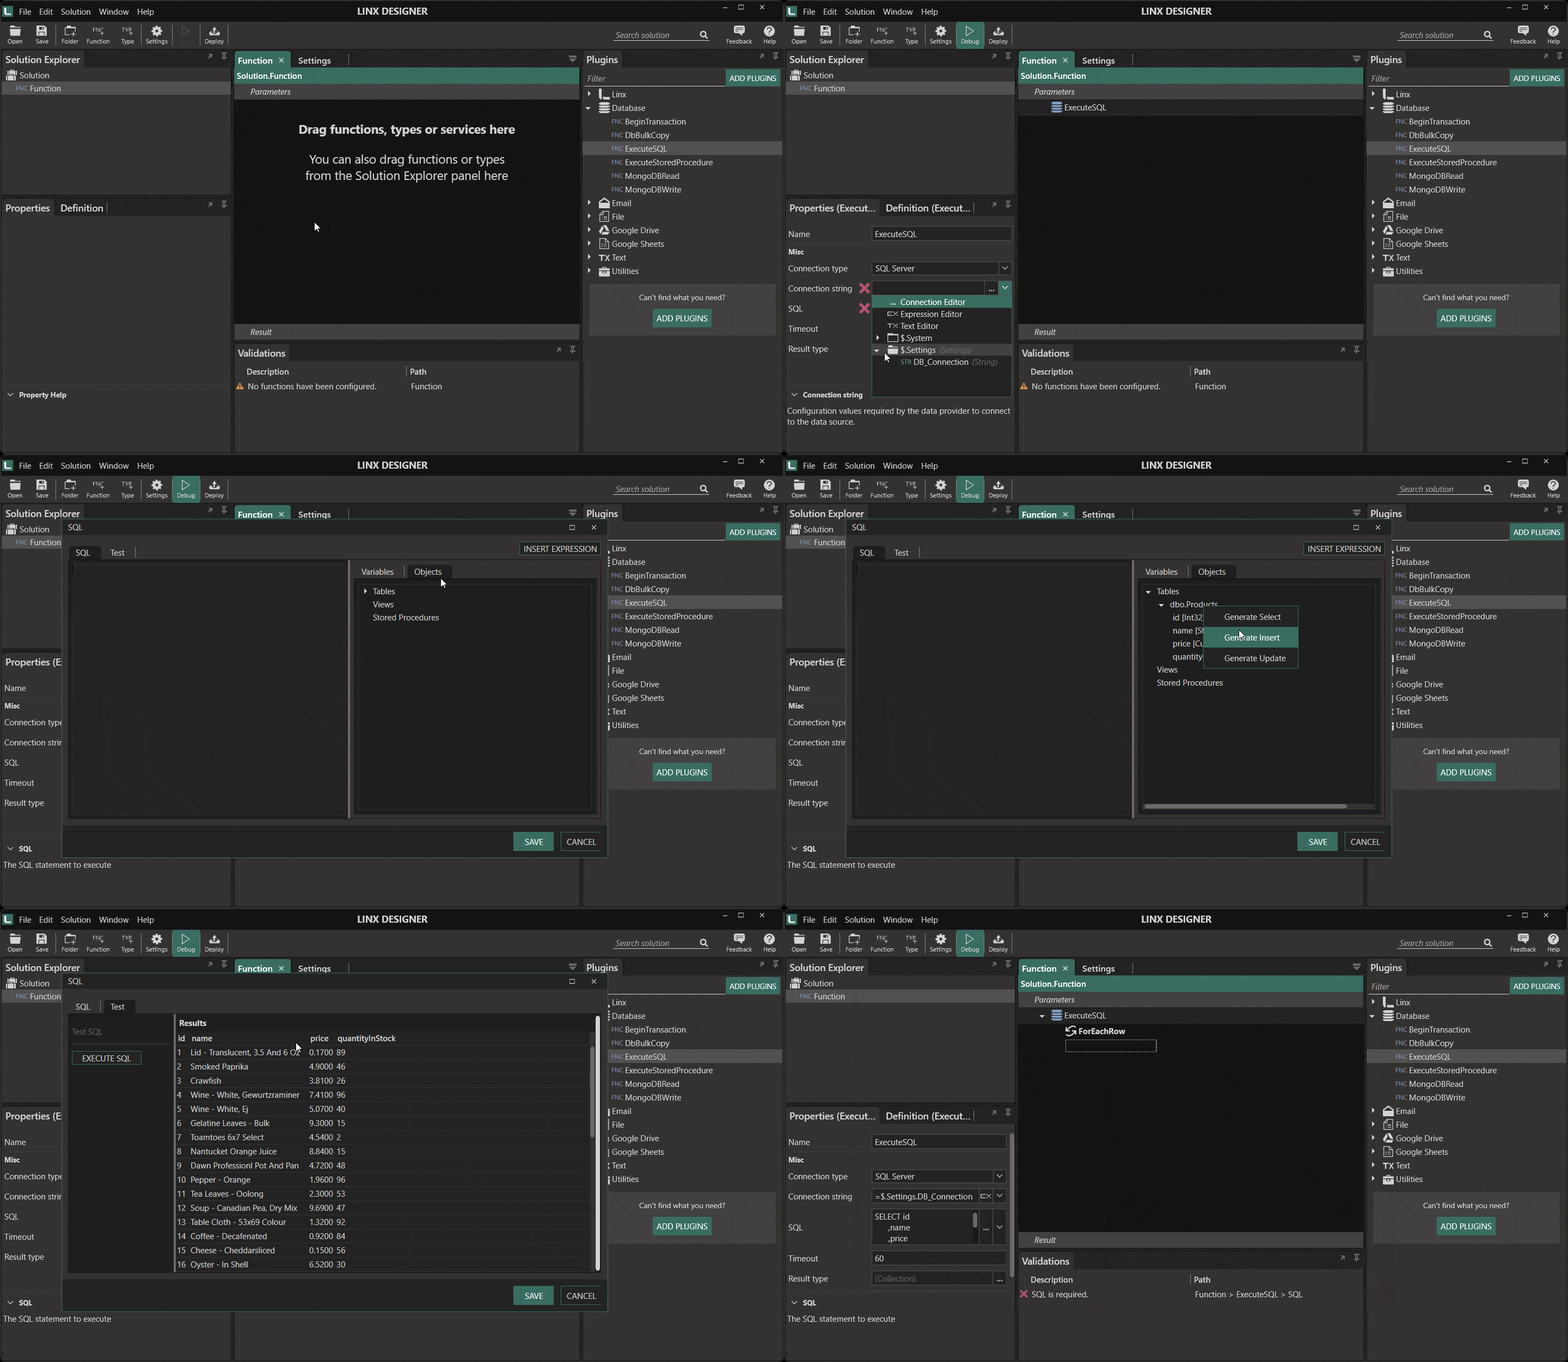
Data can be read from and written to:
- MSSQL
- MySQL
- Oracle
- PostgreSQL
- SQLite
- MongoDB or other
- Any other OLE/ ODBC databases
Connecting to Databases
To connect with your database, you have to provide a connection string that specifies the configuration values required for the connection.
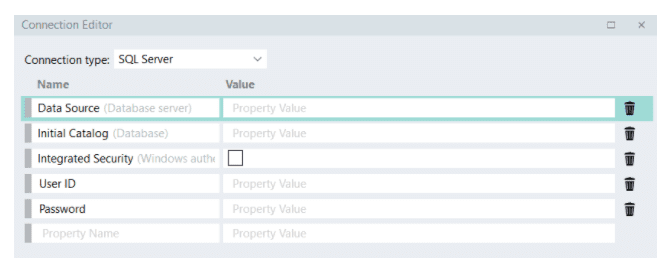
The Connection Editor helps build the connection string by offering your selected connection type’s most common connection properties.
For example, the Connection Editor will prompt you for the following when you are connecting to SQL Server:
Commonly Used Connection Strings
Here’s a quick reference of connection strings for some of the most used database types:
SQL Server
Not named, Windows authentication: Data Source=serverAddress;Initial Catalog=databaseName;Integrated Security=True;
Named server, no Windows authentication: Data Source=serverName\instanceName;Initial Catalog=databaseName;Integrated Security=;User ID=username;Password=password;
Example string:
Data Source=JOHNC\SQLSERVER2016;Initial Catalog=employees;Integrated Security=False;User ID=sa;Password=myexamplepwd123
Oracle
Using TNS-names entry: Data Source=TNSname;User ID=username;Password=password;
Without using TNS-names entry: Data Source=(DESCRIPTION=(ADDRESS=(PROTOCOL=TCP)(HOST=serverAddress)(PORT=port))(CONNECT_DATA=(SERVER=DEDICATED)(SERVICE_NAME=serviceName));User ID=username; Password=password;
OLE DB
Windows authentication: Provider=sqloledb;Data Source=serverAddress;Initial Catalog=databaseName;Integrated Security=SSPI;
No Windows authentication: Provider=sqloledb;Data Source=serverAddress;Initial Catalog=databaseName;Integrated Security=;User ID=username; Password=password;
ODBC
Microsoft Access database: Driver={Microsoft Access Driver (*.mdb)};DBQ=databaseFilePath;
System Data Source Name, Windows authentication: DSN=dataSourceName;Trusted_Connection=Yes;
System Data Source Name, no Windows authentication: DSN=dataSourceName;Uid=username;Pwd=Password;
Execute SQL Queries Easily
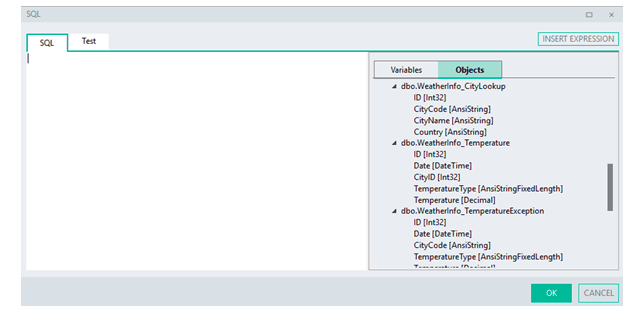
The SQL Editor can be used to write SQL statements that will be executed by the ExecuteSQL function.
Click on the Objects tab to expand your database table(s) and fields:
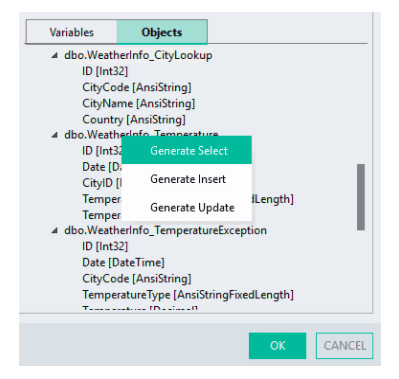
Right-click on the table name, then select the type of SQL query you want to create, e.g. Generate Select:
The main frame will now display your generated SQL query, which can be edited if required, by either typing out the statement or by including specific variables from the Variables list:
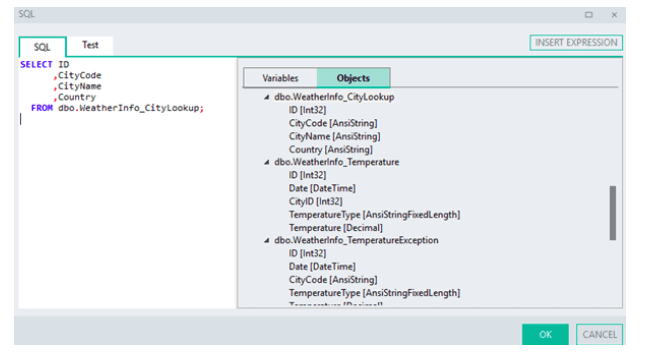
To include a variable in your SQL statement:
- Place your cursor at the position in your statement where the variable must be added
- Then click on the Variables tab (if not already selected)
- Double-click on the required variable, which will then be added to your statement.
To test the execution of your SQL query, click the Test tab.
Queries do not have to be simple select queries. You can execute virtually any query that you can run on the database. For example, on an MS SQL database, you can execute complex TSQL queries that use case statements, loops, variables, dynamic SQL and more.
Further reading:
